
Ever seen buttons which say stuff like 'CLICK ME' or maybe 'BUY NOW' or even say stuff like 'Go There' or 'Add to Cart', well, of course, everyone has.
If you have your own site, blog or small business maybe with products or something that you want people to notice, then it is common how people show ads or show buttons which they want people to click on. These buttons can be used or multiple purposes not only as ads but also for things like collecting donations, sign-ups, forms, etc. And if you have any need for a button, you came to the right place because I m going to show you various methods of how you can create your own little button.


Method 1 - Da Button Factory
This site provides an amazing button generator that is not really that hard to use. In fact, it is fun. This little tool allows us to customize our button as much as we possibly can and lets us download the button as a .GIF, .PNG, .ICO or a .JPG image. And if we do not want to download the image, we can also just get a simple embedding code that they prepare for us or get the link of your current work-space for later editing if not done. Let me tell you how to use it.
Method 2 - Html Button
And this is the result you'd get
or at least something like this since my blog as a preset CSS code for buttons. but to see the real outcome, you can go ahead and try it yourself.
Note: If you use the <button> element in an HTML form, different browsers may submit different values. Use <input> to create buttons in an HTML form.
To learn the basic attributes you can use to specify the use for your button, I recommend taking help from W3Schools' tutorials
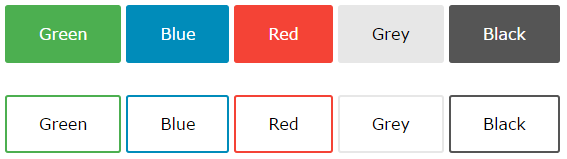
To beautify your button like my button above or to make it even better, you should use CSS styles. Why? I guess that this picture can answer that question.

If you use CSS styles and add them to your basic scripts or to the place you're using them specifically, you can do amazing things even like matching your site. For example, try using the following CSS style script
Now, to add a button while implementing the CSS script, you have to mention its class/id.
Go ahead, try it out here. There are a lot of other things you can do for your buttons, but for that, you would require the knowledge of the CSS tags, and that is why W3Schools' tutorial will help you with the CSS tags in editing buttons
Method 3 - Best CSS Button Generator - CSS Button Generator
If you have your own site, blog or small business maybe with products or something that you want people to notice, then it is common how people show ads or show buttons which they want people to click on. These buttons can be used or multiple purposes not only as ads but also for things like collecting donations, sign-ups, forms, etc. And if you have any need for a button, you came to the right place because I m going to show you various methods of how you can create your own little button.
How to Make Buttons
Well, I am guessing that you already have an idea in your mind of how you want to make your button like you already know the style you want, colors, size, shadings, and all the other stuff. Though, if you don't, then look at some of the examples providedMethod 1 - Da Button Factory
This site provides an amazing button generator that is not really that hard to use. In fact, it is fun. This little tool allows us to customize our button as much as we possibly can and lets us download the button as a .GIF, .PNG, .ICO or a .JPG image. And if we do not want to download the image, we can also just get a simple embedding code that they prepare for us or get the link of your current work-space for later editing if not done. Let me tell you how to use it.
- First of all, you have to open the editor tab as soon as you have an idea. If you don't have one, then go to see the examples. If you find one that you like but just want to edit it a little bit, then go ahead.
- After you open the editor, its time to get a bit familiar with the controls. In the editor, the first thing you should know is what you want to write, like for example, the things I wrote on the very first line. You should change the text in the text area.
- Then you have the options to change the font of the text, its color, boldness, and italicization, and also to give the text a shadow with the option to change its color and distance from the text.
- You can also change the size by making it either a fixed size or adapted to the text. You can also add the amount of padding that you want to add.
- Now comes the option of the style you want, it can either be a rectangular box, a rounded box, or a completely round box. You can also choose the corner radius.
- Next in line is the background. You can change the button's gradient type from a total of 4 options. You can obviously also change the color of the button as well.
- Now comes an optional feature. You can optionally add a border to the button of any size and any color that you prefer.
- Another optional feature is to add a shadow. If you choose to add this to your button, then you can change its color, size, and also the direction (orientation).
- When you have completely edited it to your liking, you can click save, download it as a picture, or click embed to see the ways to embed the button onto your site.
- You're DONE!
This method is great if you want to learn the basics of HTML and create a simple clickable button. To do this, you will have to learn how to do a few things. And I will show you the basics.
For example, if you want to create an alerting button, try this.
<button type="button" onclick="alert('Hello world!')">Click Me!</button>
And this is the result you'd get
or at least something like this since my blog as a preset CSS code for buttons. but to see the real outcome, you can go ahead and try it yourself.
Note: If you use the <button> element in an HTML form, different browsers may submit different values. Use <input> to create buttons in an HTML form.
To learn the basic attributes you can use to specify the use for your button, I recommend taking help from W3Schools' tutorials
To beautify your button like my button above or to make it even better, you should use CSS styles. Why? I guess that this picture can answer that question.

If you use CSS styles and add them to your basic scripts or to the place you're using them specifically, you can do amazing things even like matching your site. For example, try using the following CSS style script
<style>
.button {
background-color: #4CAF50;
border: none;
color: white;
padding: 15px 32px;
text-align: center;
text-decoration: none;
display: inline-block;
font-size: 16px;
margin: 4px 2px;
cursor: pointer;
}
</style>
Now, to add a button while implementing the CSS script, you have to mention its class/id.
<button class="button">Button</button>
Go ahead, try it out here. There are a lot of other things you can do for your buttons, but for that, you would require the knowledge of the CSS tags, and that is why W3Schools' tutorial will help you with the CSS tags in editing buttons
Method 3 - Best CSS Button Generator - CSS Button Generator
You have just learned how to create an HTML and CSS customized button from method 2. If you do not want to learn to do this yourself, an easy walk-around is to use this free tool to make CSS scripted buttons. All you have to do is follow these steps.
Comments
Post a Comment