How To Start A Blog Using Blogger And What Things You Should Do Before You Start Publishing + Infographic

If you are a writer, have some experiences to share, have an interesting life, want to give some type of wisdom, earn some extra cash or just want to pass time while creating a new hobby that helps you connect with the world and the internet in the comfort of your bed, then you should have a blog!
A Blog is your own personal space where you can write and write and keep on writing until your hands fall off if that is what you desire. It is something which runs on your rules (as long as you don't copy from someone else and have good sportsmanship) and you can even turn it into a stable site which may even, later on, turn into an income stream if you put in some hard work.
Well, no matter what reason you may have in mind, if you are willing to do some work and have some fun, then create a blog and do not worry If you don't know how then you can follow some easy steps given in this walkthrough to find out how you can dodge some bullets and make a site you can be really and truly, proud of.
How To Create A Blog
Before you start dreaming, you should know how you can create a blog. It is easy, but that is only when it comes to making a blog.
To establish it, you need to work very hard unless you just want to keep it as a hobby. But also remember to set goals, otherwise, there is no point really.
If you have come to the decision of making your blog with blogger then let me walk you through the basic blogger blog creation process.
Requirements -
- A Google Account
- Time
- Knowledge about one or many topics or an interesting life
- Good or at least average or above average writing and grammar skills in preferably English or whichever language you choose
- Good Internet Speed
- A perfect blog title or name
Now, if you meet all requirements, you have to follow the given steps to create a blog.
1. Log into your Google account and go to Blogger.com and click the 'Create Your Blog' button. If you want then you can also scroll down and take a look at the overview of the features first.


Now, this is not always true, because if a blog is well maintained, then also it does not lack behind. You may also want to keep your blog as it is, meaning with a sub-domain and that is also completely your choice.
Let me clear up a misconception many people have including me which I had, you do not have to worry if you have interlinked posts or have added many links to different posts or pages on your blog because if you are worried that it will lead your viewers to a broken link then let me tell you that Google handles all redirections. So if anyone visits your old link for the blog, then they will be redirected to the new URL.
When we open a website, the first thing how it looks. For example, what is your first reaction when you see a 3-year old's drawing? Exactly. You do not want your viewers to think in the same way.

I myself did this once, I opened a blog which only had a few posts, but it was using the tackiest theme that Blogspot has to offer, and I just quickly scraped the post and took a leap back to Google. Having a theme or template is very important because it is a major factor in the first impressions. Even if you're content is great, there are many people who are likely to overlook your content if you don't add that professional touch to your blog.
It is quite easy to do so and you do not need massive amounts of coding skills nor a large amount of money to spend on web designers. There are plenty of services that give free themes and templates with both free copyrighted and paid un - copyrighted templates. Don't worry, along with the templates, many people also offer instructions on how to make the basic changes to the template. And if you do know how to code and want to do it by yourself, then even better!
Some services that offer multiple great templates are Templatism, ThemeXpose, Blogger Templates, BloggerTheme9, etc. I myself have started a small template service which offers both copyrighted and uncopyrighted versions of themes, while the catalog is currently small, you might just find something, plus, all of them are completely free, not catch. Check it out - Template Monstrosity.


2. Blogger.com's dashboard will open. There you will see a small in-tab pop-up. In the pop-up, you will see a few blanks to be filled. In the first blank, you will have to fill in the name you have decided for your blog. You should decide that according to the topic you will write about and do not worry, you can change it later.

3. In the next blank, you can enter the web address you choose followed by a free .blogspot.com sub-domain. You can also change this later.
4. Now, you can choose a theme/template for your blog from the given options. And do not feel disappointed if you cannot see one you like because you can change the color, font, design, or even use a template given from many template providers for blogger online (some resources given below)
5. When you are all done with this, click on the 'Create Blog!' button and congratulations, you have made your blog.
When you have made your blog, you will be directed to your site's dashboard. And here, you will probably see a pop-up for searching for a TLD domain for your blog's name which can instantly after purchase be linked with your blog. This is completely optional. And also, if you do not want to buy with Google but do want to buy from somewhere else, you are allowed to and you can easily link the site with a few clicks.
Read - The Top 10 Mistakes Every Blogger MakesNow, you will see the dashboard. I am sure that the first page you will see would be the posts section. You can open that page anytime to create a post. Similarly, you can create pages, sign up with AdSense to earn some income, change the theme, change the settings, add collaborators, edit your blog's HTML code, edit the layout, add gadgets, etc. So have fun tweaking around with your blog or site or whatever you decide to make.
Things To Do Before Publishing
Now that you have officially created your blog, you might want to hold on a bit before you go any further towards posting something. Now is the time when you learn about the things every serious blogger (ex. to earn income or to spread a message) has to do before publishing. Now, if you do not go through this checklist, then you will regret it later like I did. That is why you need to make sure that you cover all of the pointers first and if you have any of your own, then those too.

Now, have you gone through the infographic yet? If you have a bit of doubt that needs to be cleared regarding any of the pointers you have read above ^ then you should continue reading ahead for a thorough explanation of each of these points.
Now, have you gone through the infographic yet? If you have a bit of doubt that needs to be cleared regarding any of the pointers you have read above ^ then you should continue reading ahead for a thorough explanation of each of these points.
1. Double Check Your Blog Title (And Also The Niche!)
This is the most important thing you need to take care of because even the slightest discomfort or change of heart that you can expect in the near future will ruin your entire gameplan and might just result in entire failure! How? This is because a name should be engaging, not complicated, creative, but don't give overdoses of it.

For example, take what happened to me, I have mentioned my story multiple times on this blog. Before this great blog ( not trying to brag tho 😉), I was just trying to pass along my time as it went on. I had a lot of interest in all things 'internet' and social stuff. So, I was reading a few articles of how I could spend some time doing something productive which is when I tried out blogging.
I created multiple blogs, but I really did not take interest in the blogging services so I jumped on over to Blogger and created my first blog without any ideas or plans. I named it, wait for it... Genius - It's Good To Know. I know, kinda creative but also, when you say it out loud, it is a bit weird too, it sounded a lot like a business but I was trying to aim for something that screams that "Info about everything is over here!".
I created almost everything you will learn about later on in this post but then I had a change of heart and decided to change the topic along with name so I had to do a lot of things all over again, and this time I named it... Genius - It's good to blog, see the resemblance, but then I realized that it was a tacky name so I had to change it again to which point I came up with Bloggers Live Online.
So basically I had to go through a lot of hurdles and making sure that you actually have the niche and blog title that suits your choices 100% is extremely important unless you are ready to take a chance, but that mostly seems to create damage.
2. Are You Going to Use a TLD?
Now, while this step might not be compulsory, but it is important to decide beforehand for multiple reasons whether or not you are going to be using a TLD. Yes, you are always allowed to link a TLD (Top level domain) with your blog whenever you want to and not necessarily at the beginning of your blog, but you should decide. Let me explain somethings to you.
Read - How to Link a Blogger Blog with a Custom TLD & How to Get Free Custom TLDsWell, one thing that I have noticed a lot is that most sites with custom TLDs seem to look very professional and are quite easier to remember, this is why the audience also likes to visit such sites more because the authority of the blog in the common viewers' eyes is boosted because of the same and having such a pleasureful first impression on people from the beginning might just help you get more viewers faster.
Now, this is not always true, because if a blog is well maintained, then also it does not lack behind. You may also want to keep your blog as it is, meaning with a sub-domain and that is also completely your choice.
Let me clear up a misconception many people have including me which I had, you do not have to worry if you have interlinked posts or have added many links to different posts or pages on your blog because if you are worried that it will lead your viewers to a broken link then let me tell you that Google handles all redirections. So if anyone visits your old link for the blog, then they will be redirected to the new URL.
If you have a TLD then your blog will look more professional and will itself boost the blog's authority in the people's eyes, but it is also completely fine if you do not want to add one. And if you plan on doing it later then it is also okay.
3. Upload a Blog Theme or Template
Once you have done the important basics, now you have to start working on your appearance. As I have mentioned in my last post for which I have given the link above, a common mistake that almost every beginner blogger makes is that they don't focus on the looks of the blog. I have said this before and I will say it again, on the internet, looks do matter. This is because it is a website, not the person themselves. So, there is no other way to engage.When we open a website, the first thing how it looks. For example, what is your first reaction when you see a 3-year old's drawing? Exactly. You do not want your viewers to think in the same way.

I myself did this once, I opened a blog which only had a few posts, but it was using the tackiest theme that Blogspot has to offer, and I just quickly scraped the post and took a leap back to Google. Having a theme or template is very important because it is a major factor in the first impressions. Even if you're content is great, there are many people who are likely to overlook your content if you don't add that professional touch to your blog.
It is quite easy to do so and you do not need massive amounts of coding skills nor a large amount of money to spend on web designers. There are plenty of services that give free themes and templates with both free copyrighted and paid un - copyrighted templates. Don't worry, along with the templates, many people also offer instructions on how to make the basic changes to the template. And if you do know how to code and want to do it by yourself, then even better!
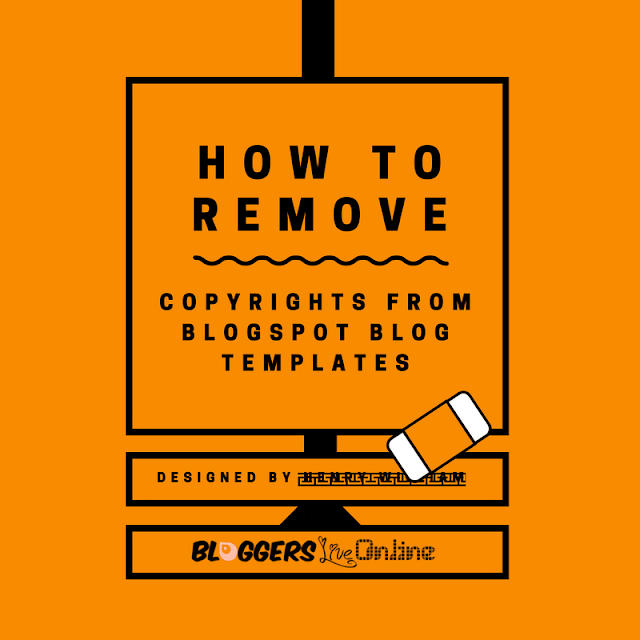
Read - How to Remove the Designed by/Created by Copyright Mark from Blogspot TemplatesAdding a template to your blog is very easy too. All you have to do is navigate to the Template section of your blog's Dashboard and on that page, there would be a Backup/Restore button which you need to click on to be able to upload your template. And to make the basic changes, on the same page, there would be an HTML Editor button which you can click on to do the rest of your work.
Some services that offer multiple great templates are Templatism, ThemeXpose, Blogger Templates, BloggerTheme9, etc. I myself have started a small template service which offers both copyrighted and uncopyrighted versions of themes, while the catalog is currently small, you might just find something, plus, all of them are completely free, not catch. Check it out - Template Monstrosity.
So, basically, you need a custom template to add your custom touch and feel onto your blog. This will not only increase your blog's style and looks, it will also make it look more professional which is a quality many viewers look for.
4. Decide on Your Blog's Theme Colors
Well, this step is actually quite related to step 3. In this step, you have to decide your main theme colors. When you first visited my blog, I am pretty sure that you saw my theme colors, black and orange, clearly. This wasn't just like a fashion choice to choose these two colors, at least not entirely.
Well, there were actually multiple reasons behind this choice, including some that you should consider. First of all, my last choice was using the color pink, that was when I was new to the blogging world. And I was not able to make those colors work, actually, I was, but it seemed like that was a color more leaned over to a cutesy or girlish perspective, and to make it more neutral, I started exploring more options.

Afterward, when I had also finally decided on my niche, I had the perfect idea for my themes color too. After uploading a theme, I started playing with it and the CSS to change the colors. Since my niche was about blogging and everything related to Google's Blogger service, I chose the color orange, which if you hadn't noticed, has a primary color which is also Orange. So I chose the shade the suited my blog best and since two primary colors are the best number of primary colors, I decided to go with Black, not only because it goes with everything, also because it seemed appropriate and it was also my favorite color.
"Effective and comprehensive brand strategy must consider the critical importance of color. A color is far more than a simple aesthetic consideration in the toolkit of components that make up brand identity and experience. The color is the very first perception customers will have with your brand, and along with perception comes a whole host of emotional associations." - Brand Strategy InsiderIncluding the looks, a brand color is also useful in many other activities too. It is a part of creating your brand's identity. It will give something for people to remember you by. It is because people associate mainly shapes (you will learn about what I mean by shapes in the next step) and colors with brands and services. For example, what comes to mind when I say the letter P in a Red Circle, or A Black Apple, or maybe even a Red can with a slightly Colorful Circle? I am sure you are able to associate most brands with colors easily. Though, your primary colors should also match certain criteria, meaning you should not just go with any color. Follow some of these tips -
- You should try to associate your primary colors with the niche of your blog. For example, if it is about blogging, try going with orange, some people also use pink. And for other examples, if it is about racing, then go with Red or Black, or if Traveling is what you write about, then try using Red or something related to an area if it is specific.
- Your blog should not be just one single color, two or three colors max. is the perfect number of primary colors. More than that could look weird unless you are good at coding to be able to make a Rainbow look work. Multiple colors are suitable for kid related sites, art and craft sites, or things that either involves creativity or randomness. It can also be used in a site to talk about yourself, like a profile site.
- If you are aiming towards a specific target audience, you should try to figure out what they would like on such a site, or try comparing different brands and how they color their products within the same genre.
- The colors you chose should not be too flashy, and having one that is primary does not make it a necessity for it to be everywhere on the page. Try choosing a color that works with other common colors like white, gray and black because your text and background should be these colors.
- Remember that your brand should have its own brand color, the other 1 or 2 colors you will choose will be part of your entire color scheme. So you need to choose accordingly.
- Notice the mood of your colors. Using a dull color like gray or a bright and happy color like red or maybe blue. And also remember the message it conveys, Royal blue meaning stability and reliability along with its maturity. Use a color which promotes the message you want to deliver.
These tips can help everyone choose their primary colors. Another few things you could use your primary colors along with are while creating images, advertisement, promoting something, associating something or any other such activity.

Another thing to note is that a color scheme is not only necessary for bloggers, but any webmaster, graphic designer, YouTuber, or even a company with products.
So, the main point is that you need a main color or a color scheme to create your brand identity, along with adding your personal touch and for delivering your message.
5. Make Your Theme Responsive
In the very near future, all people of this world with moderate incomes and modern knowledge will have mini devices in their hands, whether it would be a phone, tablet, or maybe even a phablet. In fact, that time has already come!
That is exactly what you have to prevent when it comes to your blog. You have to make sure your template is optimized to be viewable on other devices along with laptops, phones, tablets, iPods, iPad and the list goes on. But you do not really have to work too hard for this because, luckily, there are multiple options of templates for you to choose from that are given by providers like the ones I have mentioned above already that give out responsive themes, meaning that you don't have to even attempt coding and you can also get your job done.


Did you know that more than 52% of your traffic comes from mobile devices? Shocking right?So, as new technologies create more gadgets, the use of heavy devices (laptops and computers) for the regular readers decrease. And, have you ever viewed a site with is not mobile optimized, on a mobile? If yes, then you must have seen how it tries to fit into your screen all together creating an ugly look.
That is exactly what you have to prevent when it comes to your blog. You have to make sure your template is optimized to be viewable on other devices along with laptops, phones, tablets, iPods, iPad and the list goes on. But you do not really have to work too hard for this because, luckily, there are multiple options of templates for you to choose from that are given by providers like the ones I have mentioned above already that give out responsive themes, meaning that you don't have to even attempt coding and you can also get your job done.

After applying the template, borrow some of your friends or family's phones or other devices and check to see if your site is awesome and make a few tweaks accordingly because this will definitely pay off. Otherwise, you can always use great online resources which provide multiple phone screen dimensions on their sites for you to see how your site looks like on numerous devices.
So, this means that you need to be giving as much importance to your blog's appearance on other device platforms as you do for laptop and computer screens.
6. Create a Blog/Brand Logo
Having a blog is not enough. At least not until you also establish your identity, so that people would have something to recognize you by. I have already talked about brand identity and how people remember your brand by remembering certain aspects of the brand, Remember, how I said that colors and shapes help in remembering stuff because when I said shapes, I was hinting at logos and designs.


Once the colors and shapes start looking like they go along with each other like in many popular brands, it just creates the perfect ensemble so that no one forgets it, and that is what you have to aim for!
There are many great tools for this, that too of different types. First of all, you can find tons of logo generators online, but I would recommend to use them only to find inspiration. After that, there are many image-creating services like Canva.com, Pizap.com, etc. You can also find many free vectors online to do your job or if you are willing to, then you can even hire someone to create your personalized brand which would definitely reach the audience in a positive manner.
Another step in the process of creating a brand's identity is it's logo or signature shapes. This will boost your authority and will help all the time in copyrighting, or just as a simple way to remind someone about your blog.
7. Create a Favicon for Your Blog
This step is actually even easier than the rest. When you open a tab, for example, the tab that is currently open on your screen, when you select a tab, you can see a tiny cute image that represents your site, and it also most of the time looks just like the logo.

These tiny images also make your sites look more professional. If you do not add these, you will have to use a pre-set favicon. Like if it is a blogger blog, then you will have to use a blogger favicon, if it is a WordPress site then you will have to use a WordPress favicon, and if it is a normal hosted site, then you will have to use the unattractive blank page favicon. All of these pre-set favicons look very unattractive.
Adding a favicon will not only make the site's tab look more attractive, it will also help to make your site stand out more than the others. It will make the reader's job easier to relocate your site's tab and it will be a win-win situation for everyone!
Doing this is also not really hard. There are many online favicon generators like favicon.cc, favicon-generator.org, etc. Many of the generators either allow you to draw and create a favicon, or allow you to upload a favicon and convert it into a favicon, and some even allow editing. Plus, I personally think that this is also a fun process.
Once you have actually made your favicon, if you use blogger, then you should go to your Template Editor. There, at the top, you should see the option to change your favicon.
The point is that a favicon will help your viewers easily find you and will give a cute look to the tab. It will let people know that you know what you are doing.
8. Do Your Basic Research (SEO, Keywords, Niche Related, etc.)
You can't really do anything unless you know exactly what you are doing unless you are okay with having a 90%+ chance of failing. Yes, this is true! Now, we have moved on a bit further from the point of just customizing your blog to where to have to start preparing for actually blogging.
Now, before you start blogging, you need to know how to can get viewers, what a search engine is and how you can make it work for you, how you can profit out of this hobby and turn it into a business even! All this stuff comes with the responsibility of taking up even a fraction of space on the internet because you need to know the exact purpose of what you are doing, how you are going to fulfill your wishes and extra stuff too.
Now, let me tell you exactly what you need to research a bit more on and what you will have to use for which purposes. First of all, is this entirely going to be a hobby where you wouldn't really care if you got noticed or do you want to profit out of this? I am pretty sure that if you are here then you want to be heard, want to gain viewers and probably even want to make some profits.
Next, let me tell you about something simple. SEO. this is a common term used in the world of the internet creators. SEO stands for search engine optimization which is when you optimize your blog, site and especially your content in such a way that your website gets noticed by search engines like Google or Yahoo or Bing which would mean that there would be a higher chance for your site to get noticed by people who search for stuff related to the content you have written. You got all of that? Great! Because now it is time for you to gain more knowledge about this topic!
So if you are interested in making money in the future, then remember this, More Search Requests + Less Competition = More Profit. This basically means that in order to make more money and even attract more viewers, you should aim at writing about stuff that a lot of people are interested in but not many people have already written about. You should also do specific Keyword research. So if the concept is still not clear, go ahead and do more research about this topic too.
But to actually be able to choose high-paying Keywords or to be able to write about stuff with high demand but possibly less competition, you have to choose a niche. The niche of your content means the overall topic all of your content is based on. The most popular and profitable niches are actually all about Health, Money, and anything that involves self-help.

I did not know how to write attractive content. I used to use a weird and unattractive amount of size changes that occurred out of nowhere, I used colors excessively, that too in tiny amounts of content. I just used to jot down a few little points about some random topic and I actually hit publish! I have regretted that time ever since. That is what I want to prevent from happening to you.

Now, before you start blogging, you need to know how to can get viewers, what a search engine is and how you can make it work for you, how you can profit out of this hobby and turn it into a business even! All this stuff comes with the responsibility of taking up even a fraction of space on the internet because you need to know the exact purpose of what you are doing, how you are going to fulfill your wishes and extra stuff too.
Now, let me tell you exactly what you need to research a bit more on and what you will have to use for which purposes. First of all, is this entirely going to be a hobby where you wouldn't really care if you got noticed or do you want to profit out of this? I am pretty sure that if you are here then you want to be heard, want to gain viewers and probably even want to make some profits.
Next, let me tell you about something simple. SEO. this is a common term used in the world of the internet creators. SEO stands for search engine optimization which is when you optimize your blog, site and especially your content in such a way that your website gets noticed by search engines like Google or Yahoo or Bing which would mean that there would be a higher chance for your site to get noticed by people who search for stuff related to the content you have written. You got all of that? Great! Because now it is time for you to gain more knowledge about this topic!
Read - Beginners Guide to SEO, How to Manually Add a Search Description into a Blogger PostAfter you are done researching about SEO, you must have also probably found out about Keywords and their usage. If you haven't, then let me tell you that keywords are also part of SEO and they are basically just the words people search for on Search Engines. Keywords also help in making money, like with AdSense. Some keywords have higher pay rates which mean more money.
So if you are interested in making money in the future, then remember this, More Search Requests + Less Competition = More Profit. This basically means that in order to make more money and even attract more viewers, you should aim at writing about stuff that a lot of people are interested in but not many people have already written about. You should also do specific Keyword research. So if the concept is still not clear, go ahead and do more research about this topic too.
But to actually be able to choose high-paying Keywords or to be able to write about stuff with high demand but possibly less competition, you have to choose a niche. The niche of your content means the overall topic all of your content is based on. The most popular and profitable niches are actually all about Health, Money, and anything that involves self-help.
Read - 48000+ Highest Paying Keywords/Niches for Bloggers, How to Get More Page and Site ViewsThis is not it. Now once you have chosen a niche and covered all of the basic stuff including how to use the products available to you to the fullest, how you can work around some glitches, how you can drive traffic from other sources etc., you have to actually find out more stuff and gain extra knowledge about the thing you are planning to write about. So that is completely dependant upon what you will choose. Did you realize that even this entire article is also a source for you to gain knowledge?
Knowledge is Power! And this is definately true. If you want to find success in anything you do, you firstly need to find more knowledge so that you can fix a problem even before it is actually made.
9. Create a Posting Style and Time-Table
Do you remember how I said that you do not want your blog to look like a 2-3-year-olds drawing? which is why you should upload a template? Well, that fact also applies to your content. When I say posting style, I mean that you have to decide how you would want to write your content. Many people, including me at the absolute beginning of my journey, wrote horribly. Not only the content but also the scripting of the content.
I did not know how to write attractive content. I used to use a weird and unattractive amount of size changes that occurred out of nowhere, I used colors excessively, that too in tiny amounts of content. I just used to jot down a few little points about some random topic and I actually hit publish! I have regretted that time ever since. That is what I want to prevent from happening to you.
When you write content, you should follow these pointers -
- Don't leave to many spaces between lines or else it would look like ugly and empty content.
- Only use colors sometimes, probably to highlight something important, or just a few words, that too from time to time.
- Don't add too many lists to a post with less amount of content.
- Try to maintain a text size and font consistency. Like, for example, I use normal text size for my text, large for my sub-headings. I do not use Headings inside the content of my post because they sometimes clash with my SEO, and I always use Arial font for text with Calibri for Code Scripts and Snippets.
- Use Blod, Italic and Underlining options to highlight different things. For example, the Bold in my content means important, Italics points something out and all of them together is used wen an important question is asked.
- Use Images from time to time and always remember to add Alt tags from the image properties option in Blogger which would help improve you SEO.
Now that you have found out about these useful pointers, next comes the time when you make room in you life with enough time to actually get a chance regularly to be able to actually implement these things. If you do not understand what I mean, let me tell you in a simple sentence - Make a Post writing and publishing timetable!
This is all on you, because if you go to school or have a job, then you also need to have your priorities in order. For example, I have to manage my everyday school life with this blog and it turns out that I am doing something right because I am seeing my results. Even if you are home-maker, or have or just want to make a little extra cash, whatever you do, you have to know what your priorities are.
This is all on you, because if you go to school or have a job, then you also need to have your priorities in order. For example, I have to manage my everyday school life with this blog and it turns out that I am doing something right because I am seeing my results. Even if you are home-maker, or have or just want to make a little extra cash, whatever you do, you have to know what your priorities are.
10. Create A Newsletter or Update Sign Up Forms
You need to set this up from the start. You might not just yet know what these are, so let me tell you what they are and why they are used! Whenever a person opens up your blog, they might find you content interesting, maybe even the very first post, and they might be willing to read more from you! But what if they read it, exit, and then just forget about your site? There is a very little chance of someone bookmarking it.
That is where Update Sign Up Forms come in. You should add these forms to your blog or website because it allows an option for the reader to stay connected with your website's content. Whenever you would release a content update, in a microsecond (not literally), the content will also be sent to the reader's inbox. Plus, this is also not at all hard! Google has already provided an easy method for you to do this.
- First, go to Feedburner powered by Google.
- Follow the processes to create your own feed.
- Come back to your blogger template layout editor.
- Click the Add A Gadget button in whichever section you want.
- Add the Follow By Email Gadget which you can find by scrolling down a little.
- Enter a title for the widget and add your Feedburner provided feed link which you must've gotten after you had created the feed.
- Click Save
- That's it! You can even customize this widget from the CSS in the template HTML editor if your template provider hasn't done that already.
Well, this was all about update forms, now, if you want to offer something extra to your viewers to increase your value and to add another interesting option for your viewers to stay connected with you and your content, then you can add a newsletter subscription option. This can be the VIP area of your content. You would be able to send content to those who are actually interested in the same and actually opted for it. In this area, you can write and send stuff secretly, and the great thing is that you do not have to worry about SEO because it will automatically get where it needs to go!
Read - How to Make Money with MailChimp Newsletter Subscriptions
There are many services available for this, but I would recommend MailChimp especially if you have just started and are a beginner or have less than 2000 subscribers because then, it would act as a free option
So, basically, the need for this is to be able to form a section of loyal readers. You would be giving the chance to unique visitors to become returning visitors and loyal reader which would also mean that whenever you release content, new visitors would definitely be attracted, but along with them, your subscribed people would also get a call to come back.
11. Brainstorm Titles and Labels and Write Posts
I told you that we are near the step of actually creating content. Well, here we are! Now it is officially the time to start typing. Firstly, remember that you still have time to think about everything you have done and to choose whether or not you want to keep rolling with your current niche.

Now, it is the time that you think about what you will write. Disclaimer - You will not actually be publishing your posts yet, so keep a little more patience. What you have to do here is open your Blogger Account and enter the posts section. The great thing here is that you can take all the time you would possibly need to write your first quality posts because these would be the first impression makers of your blog. But before you do that, again go do some research and try places like Quora or Yahoo Answers to find out things people are really having issues or doubts or interests in or with regarding anything that is related to your niche.
Once you have figured out the thing you should be writing about, get to it! Start writing everything that comes into mind! Possibly even in the notepad application on your computer. An easy way to start things off is by taking one topic and by noting down some important points that you would actually write your content around later on.
While you are writing, be sure to follow the post style you had created a while back. Remember to use adequate amounts of spacing, headings, blockquotes, etc. Also, add images from time to time and don't forget to add in alt tags. While you are at it, also remember everything you learned in SEO, so also add a search description for your post. Also, interlink your posts wherever you think it is relevant.
Another thing you need to do is set out different categories for your posts in which you would also be adding your future posts. These categories, are called labels, and they help the viewer know more about that particular topic or section of topics so they can filter out the topics that they are interested about. Find out more about this here - How to Categorize Posts in Blogger Blogs.
After you have actually written your complete post, create a creative title that seems fitting to your post. Try to make it really attractive and show that it is like none other or can really solve a problem. Make it irresistible!
Keep repeating this process until you have at least 5 posts, but do not publish yet! Because when you start your blog, you will need at least a bit of content for people to browse around, and without even a minimum of 5 posts, you might have made a mistake.
This part is one of the most important things because this is where the actual magic happens. To run a blog, you obviously need to blog. And without enough content to start off with, you might head off to a bumpy start.
12. Create Important Pages and Public Documents
This is also a very important segment of creating and running a blog, or any type of website in fact! As I have said multiple times before, people are attracted to things with authority and official standings. If you can't fulfill that part, then many of times, people think that the entire project is just a joke.
A very important thing to do is to add a few important public documents. This also helps to improve your authority in circumstances like when you apply for an advertising network or want to become a part of something big. It also helps in some legal situations if ever comes the need.
The public documents I am talking about are also quite easily prepared, again, thanks to free and easy to use online tools. Some documents you can and should prepare are - Terms and Conditions or Terms of Service, Privacy Policy, if you sell products, then disclaimers for them, if you show advertisements then also for them, etc.
Now, next, besides the official pages, you also need some personally important pages. By this, I mean that you need to be able to talk about yourself and you also need a place for people to send you their thoughts. In simple words, I mean that you need to add About Pages and Contact Pages or Forms.
In the about pages, you can introduce yourself up to a personal level. You can either talk about your achievements, you can share your stories, you can tell the people how to ended up with a blog, what your interests are, how you got into a business or anything really! Just keep talking. This page is required so that people can get to know you better, to be able to see what qualifications you have and even to justify the fact of why they should trust you.
Next, you have to allow people to approach you with their problems personally. Even privately. To do this, you can create contact pages where you showcase all your contact methods, or you can create a contact form. Blogger also provides a contact form gadget, you can add it anywhere on your blog, or you can build a custom form with services like ( I recommend ) JotForm, and then you can add it to a page or in the form of a unique widget that is very beautifully implementable.
All of this is mainly important because it allows you to increase your authority and trust too. People woud think you actually know what your doing and are always prepared and well read, plus, all of this is quite easily done.
13. Create Social Media Handles
This is also very important! You would most definitely need a place to actually e able to share and self-promote you content, and social media allows you to do that for free! Try using places like Twitter, Facebook, Pinterest, etc to your advantage. How? Like this...
With Facebook, you can create a business page for your blog where you would share the content you have written or think that is relevantly important to share. Gain more followers, and they would possibly check out your site. Even with Twitter, you can do the same!
Pinterest is very popular. You can use some quality images and pin them to some interesting boards you have created in an awesome account. You can also join some group boards with a higher reach to expand your audience. Here, there is an even higher chance for people to share further more and even view your content.
Quora and Yahoo Answers are also great places to showcase your knowledge and content in front of everyone. Find people with questions related to what you write about. Try answering them and provide a link to your blog telling them to visit to find out more about a topic, or you show a preview snippet of the content or an overview which shows them everything your content has to offer.
Along with social media, also find some friends that are more popular in a niche to be able to spread towards their audience, or try to guest posts or ask for people to do guest posts for you. All of these steps should be implemented directly after you publish your posts. Keep sharing. It has also een found that the best day to share posts on average is on Tuesdays.
All of these steps, if implemented correctly, will help you expand your reach and you will gain more viewers.
Publish!!!
Yes, you read this correctly, you are finally here, you mass pulish all of your ready posts or even better, post a single post every day for as many posts you have prepared and keep writing while you have the time. This will all just give you a head start. Oh, and be sure to implement everything you have learned. Good Luck!
I hope you found this post useful, come back later to see what's new or rowse through our collection of articles, Bye for Now!

This comment has been removed by a blog administrator.
ReplyDeleteThanks admin. Your article was well-detailed and straight to the point.
ReplyDelete